


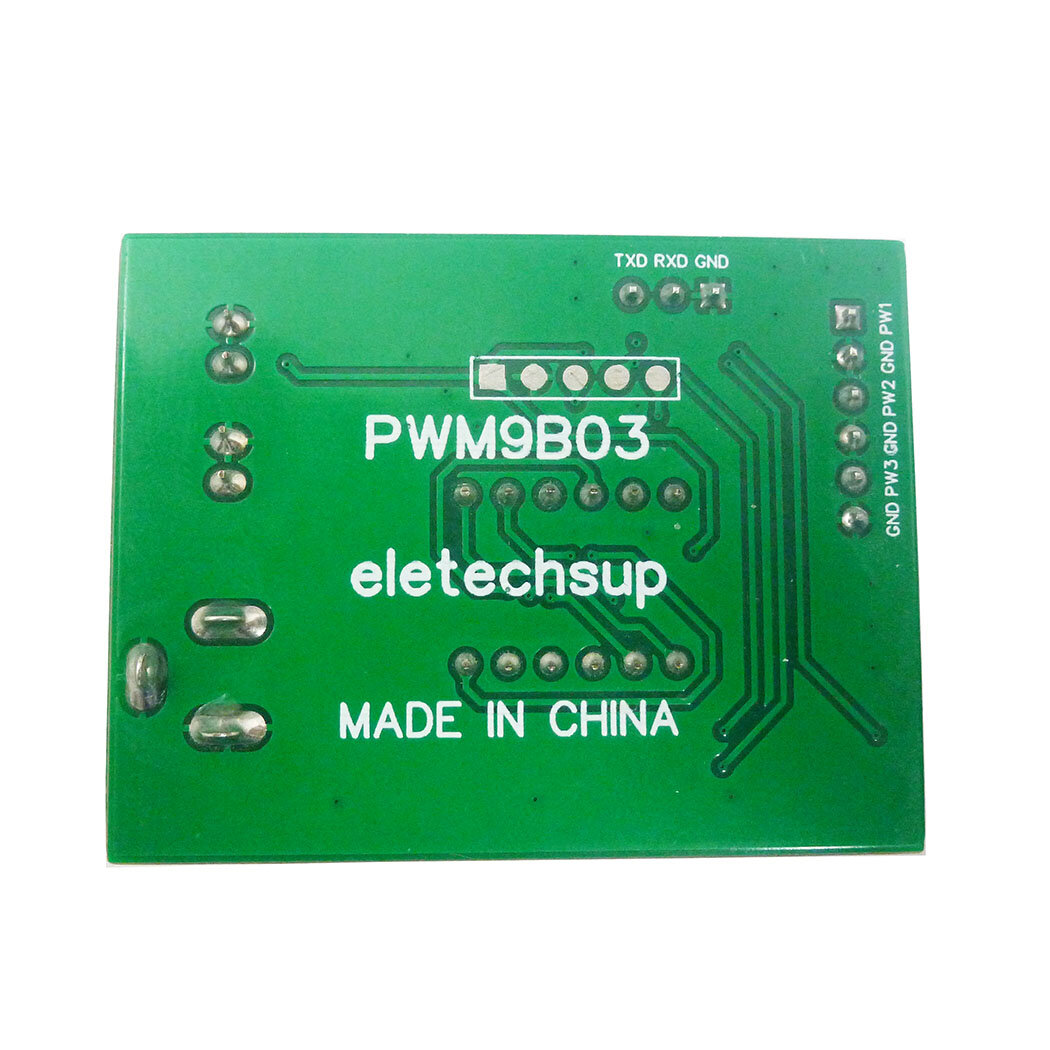

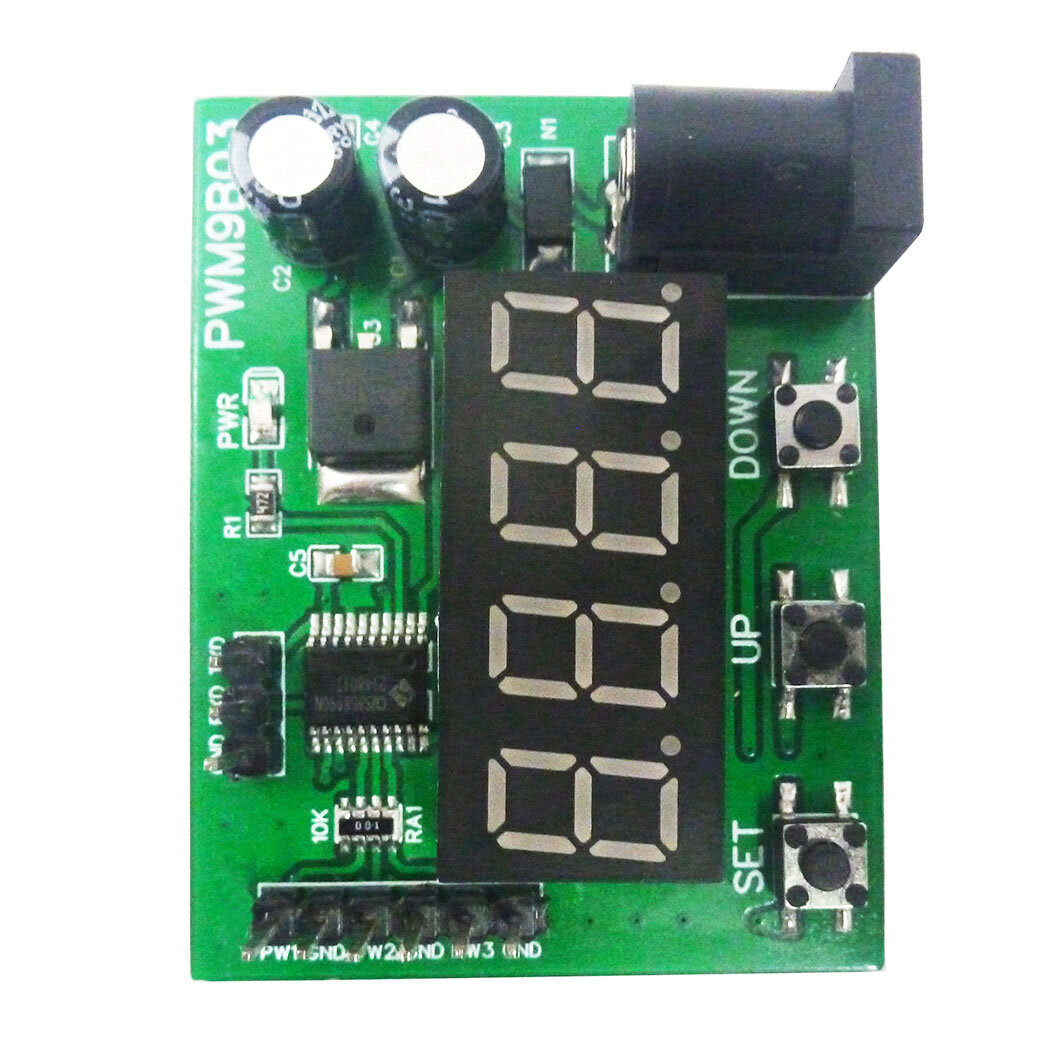

PWM9B03 3-Channel PWM Pulse Signal Generator Module

 Direct purchase from the factory
תשלום מאובטח

 מתנה חינם
 מדיניות משלוחים
 מדיניות החזרה
מתנה חינם
ברוכים הבאים ל-Roymall, האתר המקצועי שלך לרכישת מתנות חנות כלבו פרמיה. אנו מעריכים מאוד את התמיכה שלך ורוצים להביע את תודתנו על ידי הוספת נגעת התרגשות נוספת לרכישות שלך. כאשר אתה קונה אצלנו, אתה לא רק נהנה ממוצרים באיכות גבוהה שמשפרים את אורח החיים שלך, אלא גם תקבל מתנה חינם בלעדית עם כל הזמנה. מוכן לחקור את האוסף שלנו ולמצוא את המתנות המושלמות עבורך? עיין במבחר הפריטים שלנו, שלח את ההזמנה שלך וצפה להתרגשות מהמתנה החינם שלך שמגיעה יחד עם הרכישה שלך.מדיניות משלוחים
נעבוד קשה כדי לספק לך את הפריטים לאחר קבלת ההזמנה שלך ולוודא שהם מגיעים בבטחה. פרטי המשלוח יסופקו בדוא"ל האישור שלך.ברוב המקרים, ההזמנות מעובדות תוך יומיים. בנסיבות מיוחדות, יהיה עיכוב כדלקמן: כאשר אתה מזמין בשבת, ראשון או בחגים, ההזמנה תתעכב ביומיים.בדרך כלל, לוקח 5-7 ימי עבודה (יום שני עד שישי) ללא השפעה של עיכוב טיסה או גורמים סביבתיים אחרים.מכיוון ששירות המשלוחים שלנו הוא בינלאומי, זמני המשלוח תלויים במיקום שלך ולכן עשויים להימשך מספר ימים, ואם אתה נמצא באזורים מרוחקים או מדינות, אנא המתן בסבלנות.1. מדיניות החזרה והחלפה
אנו מקבלים רק פריטים שנרכשו מ-roymall.com. אם רכשת מהסוחרים המקומיים שלנו או מקמעונאים אחרים, אינך יכול להחזיר אותם בצד שלנו. לא ניתן להחזיר פריטים במכירה סופית או מתנות חינם.כדי להיות זכאי להחזרה, הפריט שלך חייב להיות לא בשימוש ובאותו מצב שבו קיבלת אותו. הוא חייב להיות גם באריזה המקורית.לאחר קבלת הוראות החזרה מאיתנו, אנא ארוז את הפריטים המוחזרים והשאר את החבילה בדואר המקומי או אצל שליח אחר.נעבד את הפריט המוחזר או המוחלף שלך תוך 3-5 ימי עבודה לאחר שנקבל אותו. ההחזר יעובד ויועבר אוטומטית לשיטת התשלום המקורית שלך.לא ניתן לקבל החזרות או החלפות אם המוצר יוצר בהתאמה אישית, כולל גודל מותאם, צבע מותאם או הדפסה מותאמת.צריך עזרה נוספת? צור קשר. service@roymall.com או Whatsapp: +86193598494712. מדיניות החזר כספים
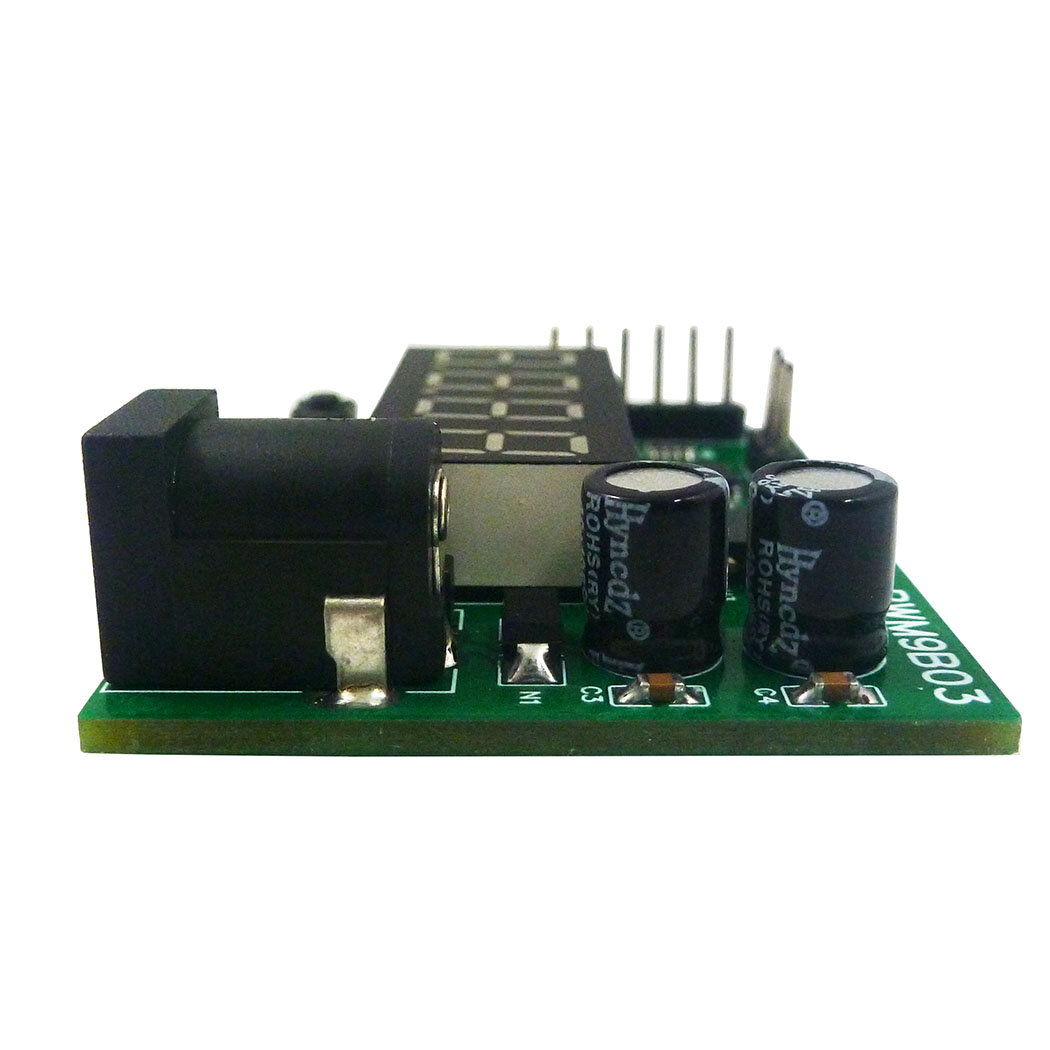
תקבל החזר כספי מלא או 100% אשראי בחנות לאחר שנקבל את החבילה המוחזרת ונבדוק אותה. ההחזר יעובד ויועבר אוטומטית לשיטת התשלום המקורית שלך.שימו לב שעלויות המשלוח וכל מכס או אגרות אינם ניתנים להחזרה. עלויות המשלוח הנוספות אינן ניתנות להחזרה לאחר משלוח החבילה. אתה אחראי לתשלום אגרות אלה ואנחנו לא יכולים לוותר עליהן או להחזירן, גם אם ההזמנה מוחזרת אלינו.אם יש לך בעיות כלשהן עם תהליך ההחזר, צור קשר. service@roymall.com או Whatsapp: +86193598494711 Working voltage: DC 6-24V
2 Working current: DC 12-30MA
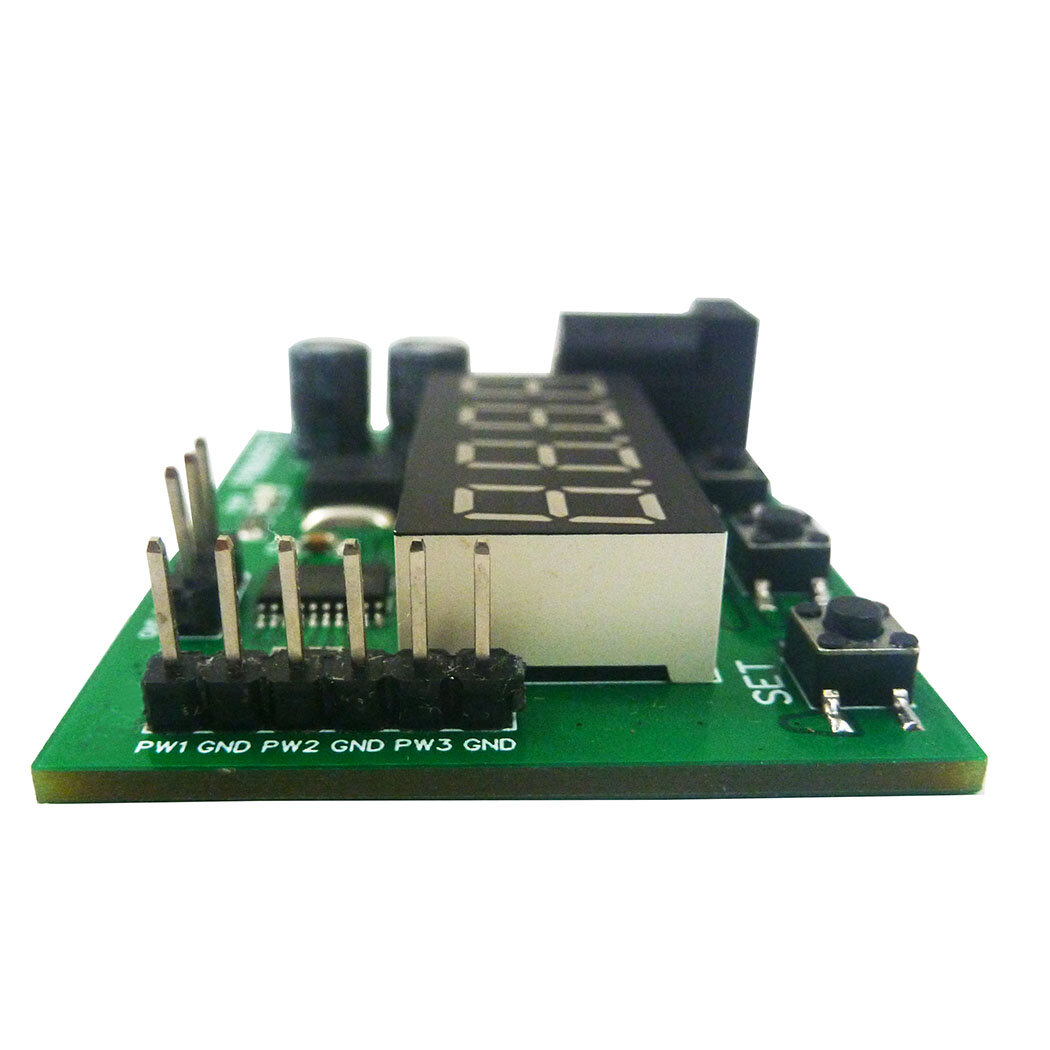
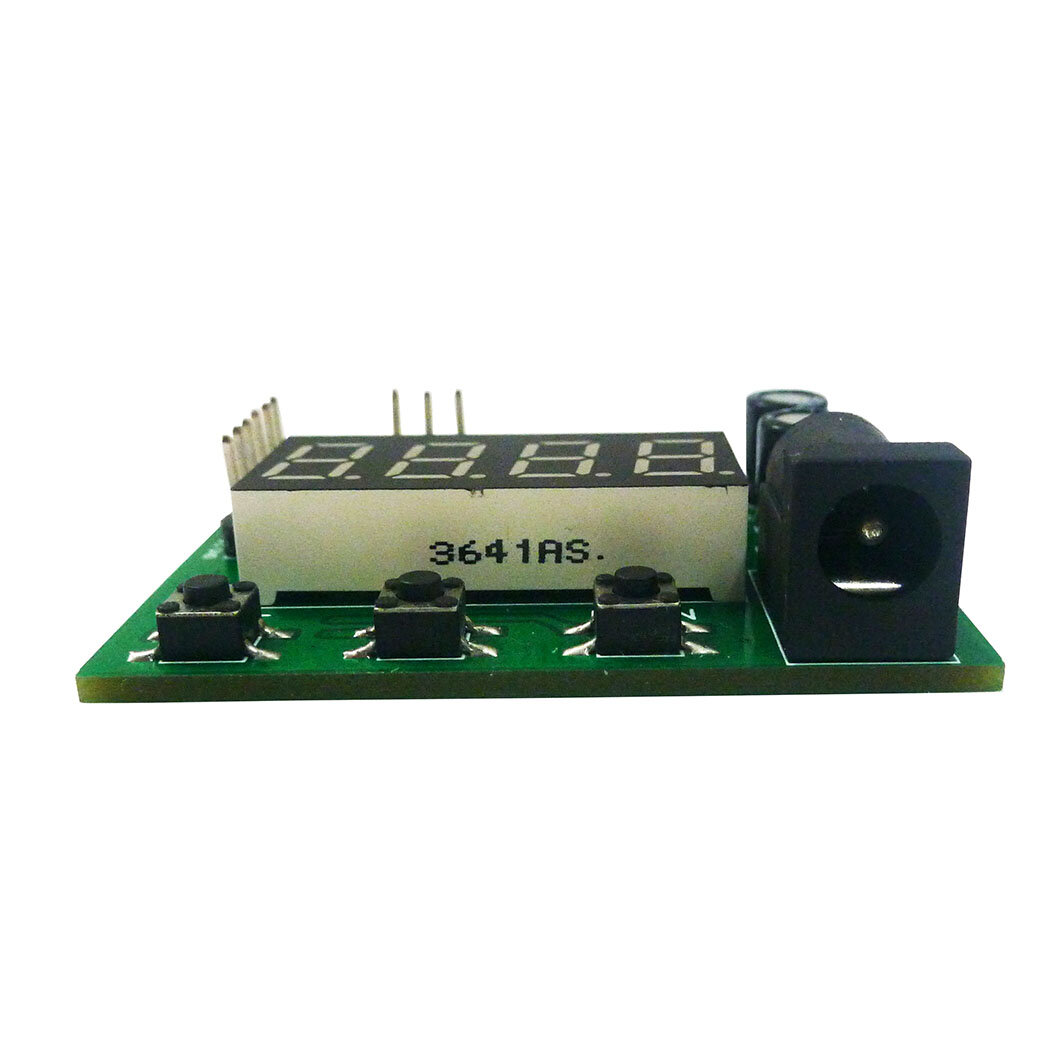
3 3 independent buttons: used to set frequency, duty cycle, working status, etc.;Support long press, short press, simple operation and diverse functions.
4 3 Channels PWM output: PWM Signal can set frequency and duty cycle respectively.
5 PWM signal level: 5V TTL level
6 PWM signal load capacity: <20mA
7 Output frequency accuracy: 0.6% (10-30 Degrees Celsius)
8 Ultra-high frequency range: 20HZ ~ 1MHZ, duty cycle 0-100%.
9. Power-off memory function: power off at any time, the last set data will be recorded and saved when power off, and the data will be displayed when power is turned on again.
10 Automatic exit function: If there is no operation for 36 seconds, the last set data will be automatically recorded, and the dynamic setting state will be exited.
11. Real-time update function: Under the dynamic setting function, you can connect an oscilloscope to grasp the set frequency and duty cycle at any time, and output the precise frequency or duty cycle.
12. Restore production setting function: in dynamic setting mode, press and hold the UP and DOWN buttons at the same time to restore the production setting (after pressing, you need to power off and power on again, the data will be updated to the default data)
13 kinds of application scenarios: The module has a variety of control methods and working modes, and three output channels, which can meet the requirements of different environments.
14 Dimensions: 49 x 38 x 13mm
15 Weight: 14.5g
PWM signal parameter description:
1 PWM frequency: the setting range is 20HZ ~ 1MHZ. The default value is 100HZ.
Four-digit digital tube, the decimal determines the unit of frequency. When there is a decimal point, the unit is KHZ, and when there is no decimal point, the unit is HZ.
The relationship between the digital tube display number and the output frequency:
0034: Indicates that the frequency is 34HZ
0234: Indicates the frequency is 234HZ
1234: Indicates the frequency is 1234HZ
1.234 : indicates that the frequency is 1.234KHZ
12.34 : indicates that the frequency is 12.34KHZ
123.4: Indicates the frequency is 123.4KHZ
0.123: Indicates that the frequency is 0.123KHZ (that is, 123HZ)
2 PWM duty cycle: setting range 0 ~ 100
0: The corresponding PWM remains low
100: The corresponding PWM remains high
1 ~ 99: corresponding duty cycle 0.01 ~ 0.99
The relationship between the digital tube display number and the output duty cycle
0005: Indicates that the output duty cycle is 0.05/5%
0050: Indicates that the output duty cycle is 0.50/50%
Note: 1. Other combinations are also possible, but whether the data can be more accurate is related to your test tool
Package include:
1u00d7 Module Board
How to set PWM output parameters:
Example 1:
For example, the parameters of the three channels are 100HZ/50%, 200HZ/60%, 300HZ/70%
View the parameters of the three channels:
1 Powered on PWM9B03 module, the PWR indicator is on, and the digital tube is off
2 Click the SET button to display PF1 (for 1 second), and then normally display 0100 (channel 1 frequency 100HZ)
3 Click the SET button twice to display dU1 (for 1 second), and then normally display 0050 (channel 1 duty cycle 50%)
4 Click the SET button three times to display PF2 (for 1 second), and then normally display 0200 (channel 2 frequency 200HZ)
5 Click the SET button four times, display dU2 (for 1 second), and then normally display 0060 (channel 2 duty cycle 60%)
6 Click the SET button five times to display PF3 (for 1 second), and then normally display 0300 (channel 3 frequency 300HZ)
7 Click the SET button six times, display dU3 (for 1 second), and then normally display 0070 (channel 3 duty cycle 70%)
Example 2:
Set channel 1 to: frequency 1000HZ, duty cycle 40%
1 Powered on PWM9B03 module , the PWR indicator is on, and the digital tube is off
2 Press and hold the SET button for 3-5 seconds, first display PF1 (for 1 second), and then flash the number
3 Click the UP/DOWN button to adjust the number to 1000 (frequency 1000HZ)
4 Press and hold the SET button for 3-5 seconds for the second time, first display dU1 (for 1 second), and then flash the number
5 Click the UP/DOWN button to adjust the number to 0040 (40% duty cycle)
6 Re-power
Example 3:
Set channel 3 to: frequency 10.12KHZ, duty cycle 60%
1 Powered on PWM9B03 module, the PWR indicator is on, and the digital tube is off
2 Press and hold the SET button for 3-5 seconds, first display PF1 (for 1 second), and then flash the number
3 Press and hold the SET button twice for 3-5 seconds, first display dU1 (for 1 second), and then flash the number
4 Press and hold the SET button three times for 3-5 seconds, PF2 will be displayed first (for 1 second), and then the number will flash.
5 Press and hold the SET button four times for 3-5 seconds, first display dU2 (for 1 second), and then flash the number
6 Press and hold the SET button five times for 3-5 seconds, first display PF3 (for 1 second), and then flash the number
7 Click the UP/DOWN button to adjust the number to 1012, and then click the SET button to adjust the number to 10.12 (frequency 10.12KHZ)
8 Press and hold the SET button for 3-5 seconds for six times, first display dU3 (for 1 second), and then flash the number
9 Click the UP/DOWN button to adjust the number to 0060 (60% duty cycle)
10 Re-power
Example 4:
Factory Reset
1 Powered on PWM9B03 module, the PWR indicator is on, and the digital tube is off
2 Press and hold the SET button for 3-5 seconds, first display PF1 (for 1 second), and then flash the number
3 Press the UP and DOWN buttons at the same time to restore the factory settings
4 Re-power


